
How Can I Clean a Leather Purse Naturally and Effectively?
Cleaning a leather purse might seem straightforward and most people grab whatever cloth or cleaner is nearby. But here is something surprising. Household cleaners can actually strip natural oils and cause permanent damage to real leather. The right supplies and a gentle touch make all the difference and could mean your favourite accessory lasts for years instead of ending up ruined.
Table of Contents
- Step 1: Gather Your Cleaning Supplies
- Step 2: Test A Small Area For Compatibility
- Step 3: Clean The Interior And Exterior Gently
- Step 4: Condition The Leather For Longevity
- Step 5: Allow The Purse To Dry Properly
- Step 6: Perform A Final Inspection And Care Check
Quick Summary
| Key Point | Explanation |
|---|---|
| 1. Gather appropriate cleaning supplies | Select gentle, non-damaging materials like microfibre cloths and pH-neutral cleaners to protect your leather purse. |
| 2. Test cleaning solutions on a hidden area | Always test a small, inconspicuous section to check for adverse reactions before cleaning the entire purse. |
| 3. Clean gently using minimal moisture | Use a barely damp cloth and soft brush to remove dirt while preserving the leather’s natural texture and integrity. |
| 4. Condition regularly to maintain suppleness | Apply high-quality conditioner to nourish the leather and protect it from future damage; do this every 3-6 months. |
| 5. Allow proper drying to prevent damage | Air dry the purse in a well-ventilated area and avoid direct heat to prevent warping or cracking of the leather. |
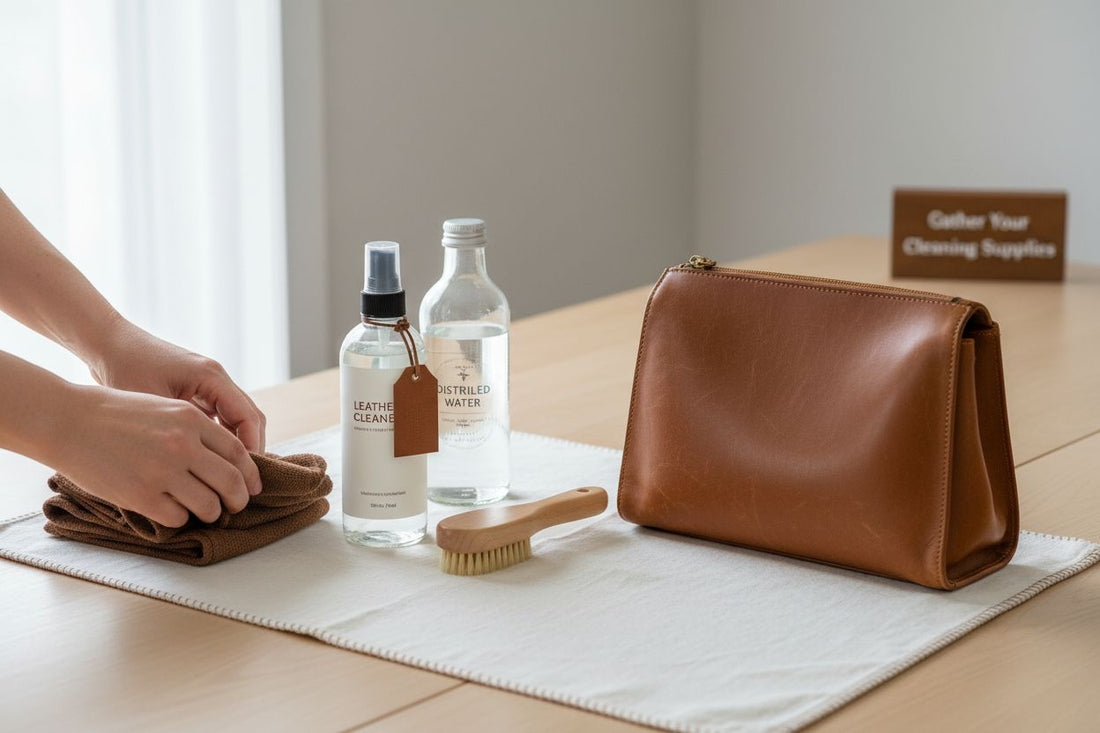
Step 1: Gather Your Cleaning Supplies
Preparing to clean your leather purse requires thoughtful selection of appropriate tools and supplies. Your success depends entirely on choosing gentle, non-damaging materials that will preserve the delicate leather surface. Leather is a natural material that demands careful treatment, so selecting the right cleaning components is crucial before beginning any restoration process.
Your primary cleaning arsenal should include several specific items designed to treat leather with respect. Microfibre cloths are absolutely essential, as their soft, lint-free texture prevents scratching while effectively absorbing dirt and moisture. You will want soft, clean white cloths that have not been previously used with harsh chemicals or cleaning agents. Professional leather craftsmen consistently recommend microfibre for its exceptional ability to clean without causing surface damage.
Next, gather mild cleaning solutions specifically formulated for leather. Avoid household cleaners, which can strip natural oils and cause permanent damage. Instead, opt for pH-neutral leather cleaners or create a gentle solution using distilled water and a tiny amount of pure castile soap. Professional leather restorers recommend selecting cleaning products specifically designed for full-grain leather, ensuring you do not compromise the material’s integrity.
Additional recommended supplies include:
- Soft-bristled brush for gentle surface dirt removal
- Clean, dry towels for blotting and drying
- Leather conditioner for post-cleaning treatment
- White vinegar (diluted) as an optional natural cleaning agent
- Soft sponges or applicator pads
By meticulously preparing your cleaning toolkit, you create the foundation for successfully refreshing your leather purse without risking accidental damage. Taking time to gather appropriate supplies demonstrates respect for your accessory and ensures a careful, methodical cleaning approach.
Below is a table summarising the required cleaning supplies, each item’s purpose, and special notes for caring for a leather purse naturally and effectively.
| Item | Purpose | Special Notes |
|---|---|---|
| Microfibre cloths | Cleaning without scratching or leaving lint | Use only clean, white, chemical-free cloths |
| Soft-bristled brush | Removing surface dust and debris | Use gentle motions to avoid damaging leather |
| pH-neutral leather cleaner | Safe cleaning solution for leather | Alternatively, use distilled water and castile soap |
| Leather conditioner | Replenishing natural oils and maintaining suppleness | Avoid petroleum or silicone-based products |
| Clean dry towels | Blotting and drying leather surfaces | Use lint-free and chemical-free options |
| White vinegar (diluted) | Optional natural cleaning agent | Use sparingly as an alternative cleanser |
| Soft sponge/applicator pad | Applying cleaning or conditioning solutions | Ensure sponge is clean and undyed |
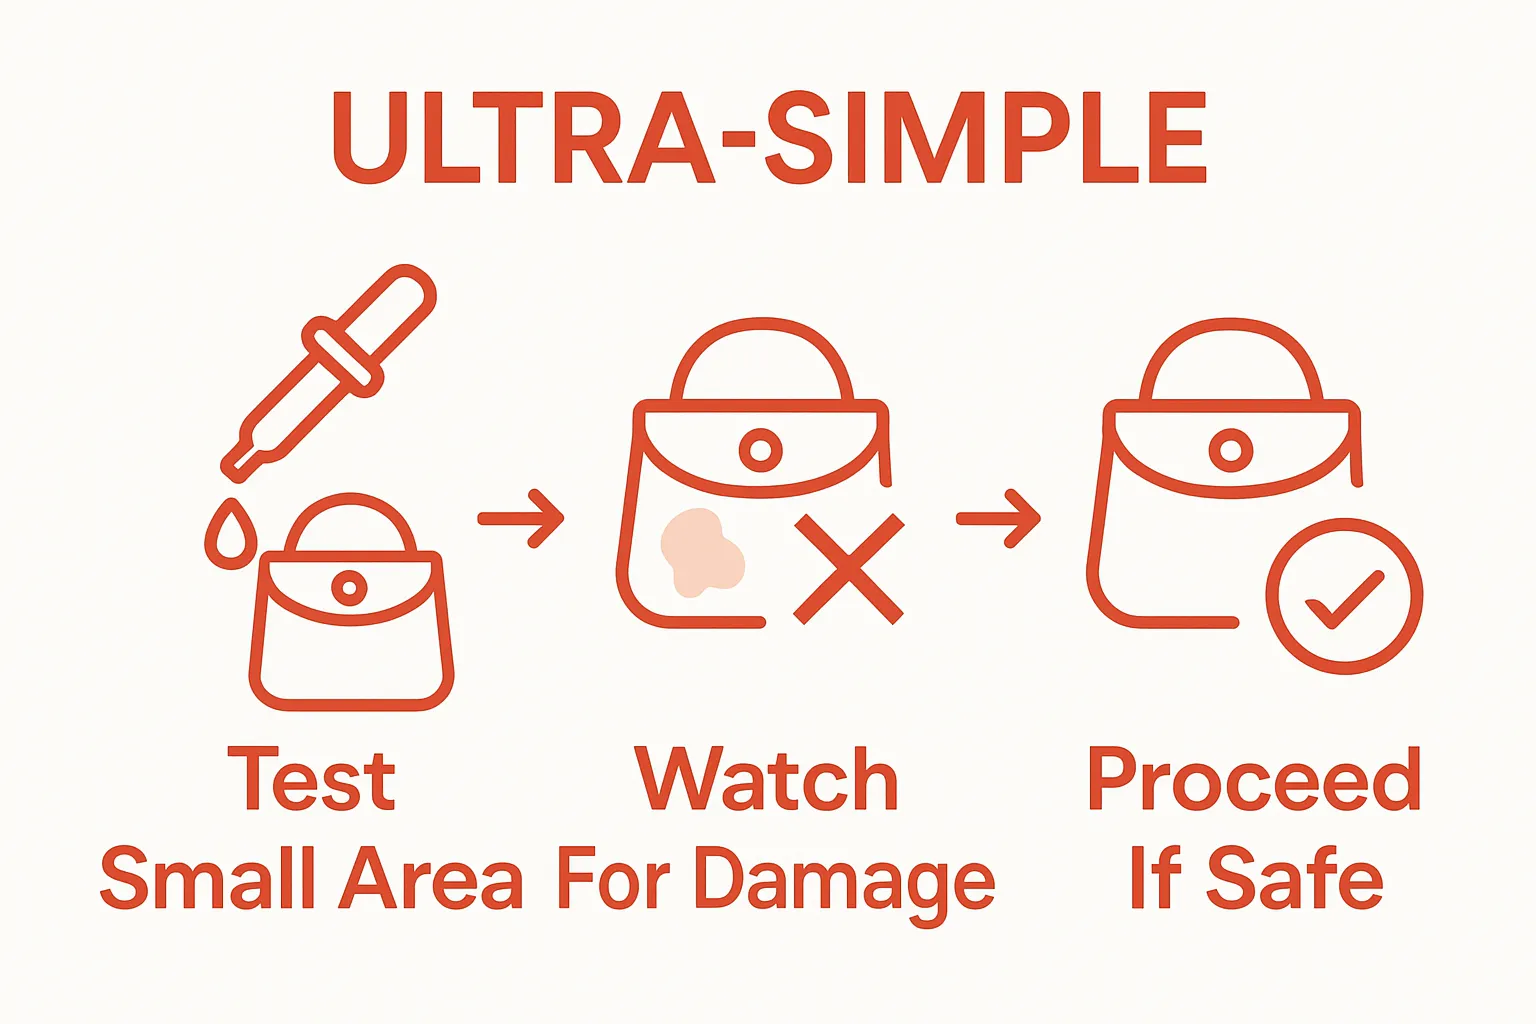
Step 2: Test a Small Area for Compatibility
Before applying any cleaning solution across your entire leather purse, testing a small, inconspicuous area is absolutely critical. This precautionary step helps prevent potential catastrophic damage that could permanently alter your cherished accessory. Think of this process as a protective measure similar to conducting a patch test before using a new skincare product.
Select an interior area that is rarely visible, such as the bottom interior seam or an inner pocket corner. According to conservation experts at the National Park Service, these hidden sections provide ideal testing locations that will not compromise the bag’s aesthetic appearance if an unexpected reaction occurs. Apply a tiny amount of your chosen cleaning solution using a clean white microfibre cloth, working the product gently into a small area no larger than a fingernail.
Observe the tested area carefully for several minutes, watching for any immediate signs of discolouration, texture changes, or surface damage. Warning signs include colour bleeding, darkening of the leather, unusual shine, or a sticky residue forming. If you notice any adverse reactions, immediately stop and consult a professional leather restoration specialist. A successful test means the cleaned area looks unchanged colour and texture wise, with no visible negative impacts.
Pay special attention to different leather types, as some are more sensitive than others. Smooth full-grain leather will typically respond differently compared to suede or nubuck surfaces. Your careful approach during this testing phase demonstrates respect for the material and increases the likelihood of successful cleaning without risking irreversible damage to your leather purse.
Key verification indicators that your test area is safe include:
- No colour transfer or bleeding
- Consistent leather texture
- No visible surface alterations
- Absence of residue or stickiness
Once you have confirmed the cleaning solution’s compatibility, you can confidently proceed to the next cleaning stage, knowing you have taken responsible precautions to protect your leather accessory.
Step 3: Clean the Interior and Exterior Gently
Cleaning your leather purse requires a delicate touch and methodical approach that preserves the material’s natural beauty and structural integrity. Leather is a living material that responds poorly to aggressive cleaning techniques, so your movements must be deliberate, soft, and considerate.
According to conservation guidelines, start by removing all contents from your purse, ensuring every pocket and compartment is emptied. This allows you to access every surface and prevents potential damage to personal items during the cleaning process. Use a soft-bristled brush to gently remove loose dust and debris from both interior and exterior surfaces. Move the brush in one consistent direction, avoiding circular motions that might embed dirt deeper into the leather’s natural grain.
Prepare a cleaning solution by mixing a tiny amount of pure castile soap with distilled water. Crucial tip: The cloth should be barely damp, not wet. Excess moisture can permanently damage leather, causing discolouration or warping. Wring out your microfibre cloth until it is almost dry to the touch, ensuring only the slightest moisture remains. Gently wipe the leather surfaces using light, sweeping motions that follow the natural leather grain.
For interior cleaning, pay special attention to corners and seams where dirt tends to accumulate. Use the soft brush to loosen compacted debris, then follow with your barely damp cloth. Be extra cautious around any fabric linings or delicate interior elements. If your purse has metal hardware, use a separate dry microfibre cloth to polish these areas, preventing moisture from causing potential oxidation or rust.
Key cleaning principles to remember:
- Always work in a well-lit, clean area
- Use minimal moisture
- Follow the leather’s natural grain
- Be patient and gentle
- Allow surfaces to air dry naturally
Once you have completed cleaning, allow your leather purse to air dry completely in a well-ventilated area away from direct heat or sunlight. The cleaning process is complete when the leather appears refreshed, with no visible moisture and a consistent, natural sheen.
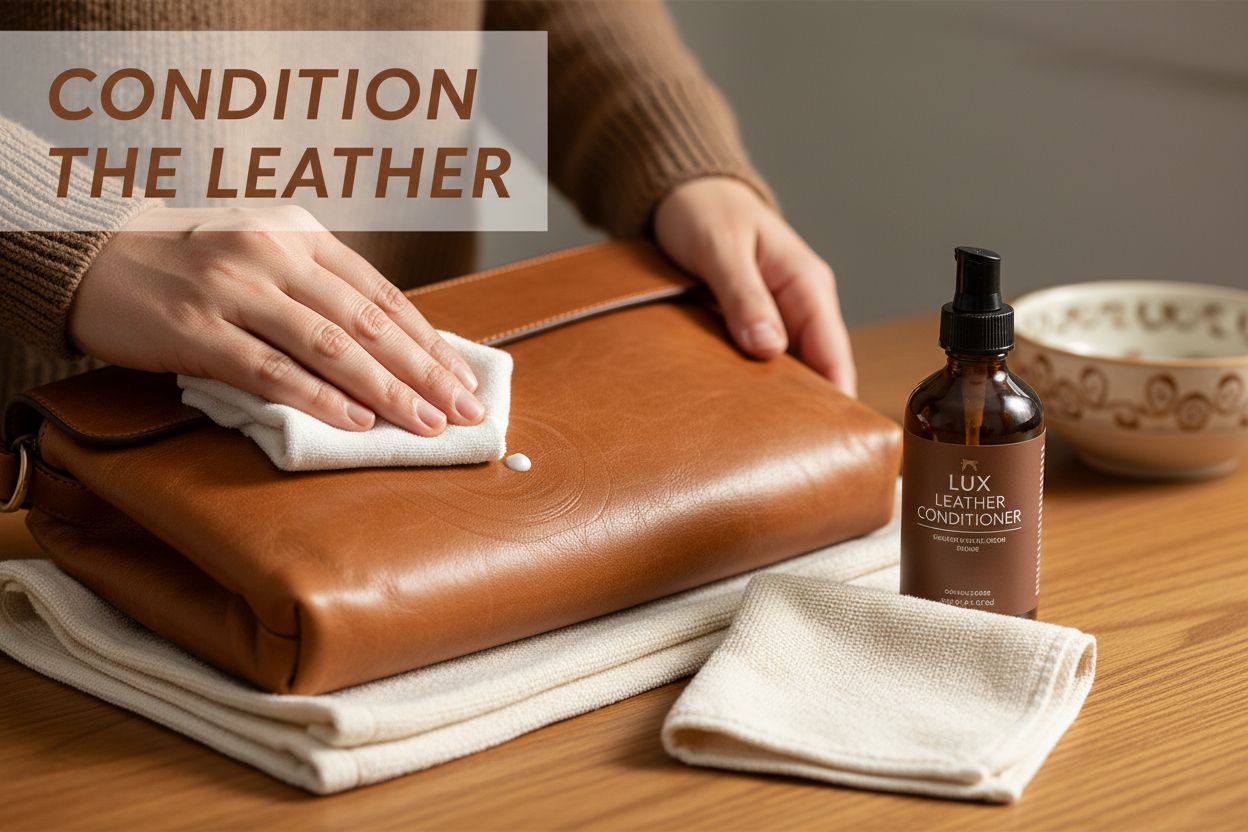
Step 4: Condition the Leather for Longevity
Conditioning is the final and perhaps most critical step in maintaining your leather purse’s suppleness and preventing premature aging. Leather is a natural material that requires regular nourishment, much like human skin needs moisturiser to remain healthy and resilient. This step replaces essential oils that were potentially stripped during the cleaning process, creating a protective barrier against future environmental damage.
Choose a high-quality leather conditioner specifically formulated for full-grain leather. Avoid silicone or petroleum-based products, which can create a temporary shine but ultimately damage the leather’s natural structure. If you want to learn more about how leather ages and develops character, explore our guide on understanding vegetable tanned leather patina.
Apply the conditioner using a clean, soft microfibre cloth, working in small circular motions. Use minimal product - a little goes incredibly far with leather conditioning. Begin at one corner of the purse and work systematically, ensuring even coverage without oversaturating the material. Pay special attention to areas that experience more friction, such as handles, corners, and edges, which are more prone to wear and potential cracking.
After application, allow the conditioner to absorb naturally for approximately 15-20 minutes. Do not place the purse near direct heat sources, as this can cause uneven absorption and potential damage. The leather should appear slightly more supple and have a soft, natural sheen - not a glossy or artificial finish.
Key conditioning principles include:
- Always test conditioner on a small, hidden area first
- Use sparingly and evenly
- Work in a well-ventilated space
- Allow natural absorption
- Condition every 3-6 months, depending on usage
Your leather purse is now cleaned, protected, and prepared to maintain its beautiful appearance for years to come. The careful conditioning process ensures your accessory remains a timeless piece that ages gracefully and develops a unique character reflecting its journey with you.
Step 5: Allow the Purse to Dry Properly
The drying process is far more nuanced than simply setting your leather purse aside and forgetting about it. Improper drying can cause irreversible damage to your carefully cleaned accessory, potentially leading to warping, cracking, or uneven texture. Your goal is to create an environment that allows natural, gentle air circulation without exposing the leather to extreme conditions.
Conservation experts recommend selecting a well-ventilated area away from direct environmental stressors, which means avoiding direct sunlight, heating vents, radiators, or any source of concentrated heat. Room temperature is ideal, with gentle air movement that helps moisture evaporate naturally. Position your purse on a clean, dry surface like a white towel, ensuring it maintains its natural shape without being compressed or stretched.
Stuff the purse lightly with white tissue paper to help it retain its original structure during drying. This technique prevents potential sagging or misshaping that can occur when leather loses moisture. The tissue paper should be soft and uncoloured to prevent any potential colour transfer. Avoid using newspaper or coloured paper, as these can leave unwanted marks or stains on the leather surface.
The drying time varies depending on the leather type and the amount of moisture used during cleaning, but typically ranges between 12 to 24 hours. Patience is crucial during this stage. Resist the temptation to accelerate the process using hairdryers, fans pointed directly at the purse, or placing it near heat sources. These methods can cause the leather to dry too quickly, leading to potential cracking or permanent texture damage.
Critical drying indicators include:
- Leather returns to its original colour
- No visible moisture on surface
- Consistent, soft texture
- Purse maintains its original shape
- No musty or damp odours
Once your purse is completely dry, gently reshape it if needed and store it in a cool, dry place with adequate air circulation. The careful drying process ensures your leather accessory remains beautiful, supple, and ready for its next adventure.
Step 6: Perform a Final Inspection and Care Check
The final inspection is your opportunity to ensure the cleaning process has been completed thoroughly and your leather purse has emerged looking its absolute best. This meticulous review transforms a basic cleaning into a comprehensive restoration, allowing you to catch any subtle details that might require additional attention.
According to conservation documentation, begin your inspection under bright, natural lighting that reveals even the most minute surface variations. Use a clean, soft white cloth to gently run across every surface, checking for any remaining dirt, uneven conditioning, or potential areas of concern. Your fingertips are remarkable tools - lightly drag them across the leather, feeling for any unexpected texture changes or rough patches that might have been missed during earlier cleaning stages.
Pay special attention to hardware, seams, and edges where dirt and wear tend to accumulate most aggressively. Examine metal components for any signs of oxidation or discolouration, and ensure that zippers, clasps, and decorative elements remain clean and functional. If you notice any persistent stains or areas of concern, consider consulting a professional leather restoration specialist who can provide targeted advice.
The conditioning process should have left your purse with a soft, supple texture and a subtle, natural sheen. Leather should feel smooth and consistent, without any sticky residue or overly glossy appearance. Flex the leather gently, checking that it remains flexible and responsive, which indicates successful conditioning and proper care.
Key final inspection criteria include:
- Consistent leather colour and texture
- No remaining dirt or cleaning residue
- Smooth, flexible leather surface
- Clean and functional hardware
- Absence of unexpected odours
By completing this thorough final inspection, you demonstrate a commitment to preserving your leather purse’s beauty and extending its functional lifespan. Your careful attention ensures that the accessory will continue to be a cherished companion for many years to come.
This table provides a checklist of final inspection criteria to ensure your leather purse has been properly cleaned, conditioned, and maintained, as recommended in the guide.
| Inspection Criterion | What to Check For |
|---|---|
| Consistent leather colour and texture | No patches, fading, or unexpected shininess |
| No remaining dirt or residue | Surfaces feel clean, free from particles or streaks |
| Smooth, flexible leather surface | Leather bends easily without cracks or stiffness |
| Clean and functional hardware | Zips, clasps, and metalwork operate smoothly |
| Absence of unexpected odours | No musty, damp, or chemical smells |
Elevate Your Leather Care with Authentic Italian Craftsmanship
Are you dedicated to keeping your cherished leather purse looking its best but concerned about damaging delicate full-grain finishes? When you invest time and care in gentle cleaning, you deserve solutions that honour this commitment. The article highlighted how crucial it is to use natural products, soft microfibre cloths, and mindful conditioning to avoid fading, cracking or unwanted chemical residue. At San Rocco Italia, we deeply understand the pain points of women who value longevity, natural elegance, and responsible maintenance for their handbags—because we handcraft our luxury leather goods using the same principles.

Now is the perfect time to experience exquisite Italian-made perfection from a woman-owned boutique that truly respects the timeless qualities discussed in the article. Discover handbags and leather accessories handcrafted by skilled artisans who share your values for gentle care and quality. Visit San Rocco Italia’s collection of luxury leather goods to find your next forever piece—and embrace everyday elegance, effortlessly. Treat your leather purse to care that matches its craftsmanship by choosing accessories built to be cherished for years.
Frequently Asked Questions
How do I clean the interior of my leather purse?
To clean the interior of your leather purse, first, remove all contents and use a soft-bristled brush to remove loose dust and debris. Prepare a cleaning solution with a tiny amount of pure castile soap mixed with distilled water. Use a barely damp microfibre cloth to wipe the interior surfaces gently, paying special attention to corners and seams.
What should I use to condition my leather purse after cleaning?
After cleaning, it’s essential to condition your leather purse using a high-quality leather conditioner specifically designed for full-grain leather. Avoid silicone or petroleum-based products, and apply the conditioner using a clean microfibre cloth in small circular motions, ensuring even coverage.
How can I tell if my cleaning solution is safe for leather?
Before applying any cleaning solution, it’s crucial to test it on a small, inconspicuous area of your leather purse. Look for no changes in colour, texture, or the formation of residues over several minutes. Ensure that there are no adverse reactions before proceeding with the entire purse.
How long should I let my leather purse dry after cleaning?
Allow your leather purse to dry naturally in a well-ventilated area away from direct sunlight or heat sources. The drying process typically takes between 12 to 24 hours, and it’s important not to rush this step to avoid damage such as cracking or warping.
